This is the first in a 2-part series on automation testing on real iOS devices with Appium + WDA + Python.
It’s a tutorial on getting started from scratch. Since getting set up with real iOS devices can be a long and complex process.
This first blog will cover all the preliminary work you need to do to make sure Appium, your app, and your device will all be able to talk to each other. And the next article will show you how to put it all together.
Real iOS device testing can only take place on a Mac. This tutorial was written with MacOS Monterey v12.0.1, Xcode version 13.0, automating an iPhone 11 running iOS version 14.5. While the tutorial should remain largely correct for other versions.
Setup Basic IOS Development Environment
First things first, let’s clean up our mac and make sure all our software is up to date. To begin with, check that we have the latest version of Xcode installed.
Then let’s launch Xcode. You will need to accept the End User License Agreement and may have to click a button to “install additional components”.

Next, since we will be using Homebrew, let’s run:
Next we will use brew to install libimobiledevice, an open source package which is able to communicate with iOS devices:
Appium also uses a package called ios-deploy for transferring iOS apps onto your device:
WDA requires an iOS dependency manager called Carthage, we need to install Carthage:
Now we have installed Appium dependencies packages, you will need to install the Appium Desktop App or Appium CLI.
Finally, let’s make sure our iOS device is set up:
- Turn the iOS device on
- Plug the device into your Mac
- Unlock the device
- Choose to “Trust” the Mac
Running tests on the device will always require you to unlock it. Let’s go into the Settings app, select Display & Brightness, select Auto-Lock, and set it to never.
Setting Up Xcode
Before using Appium to run tests on our device, let’s make sure we can manually run app on the device using Xcode.
Opening Xcode workspace and choose an app to launch, select the device you want to run the app on by clicking the below icon.

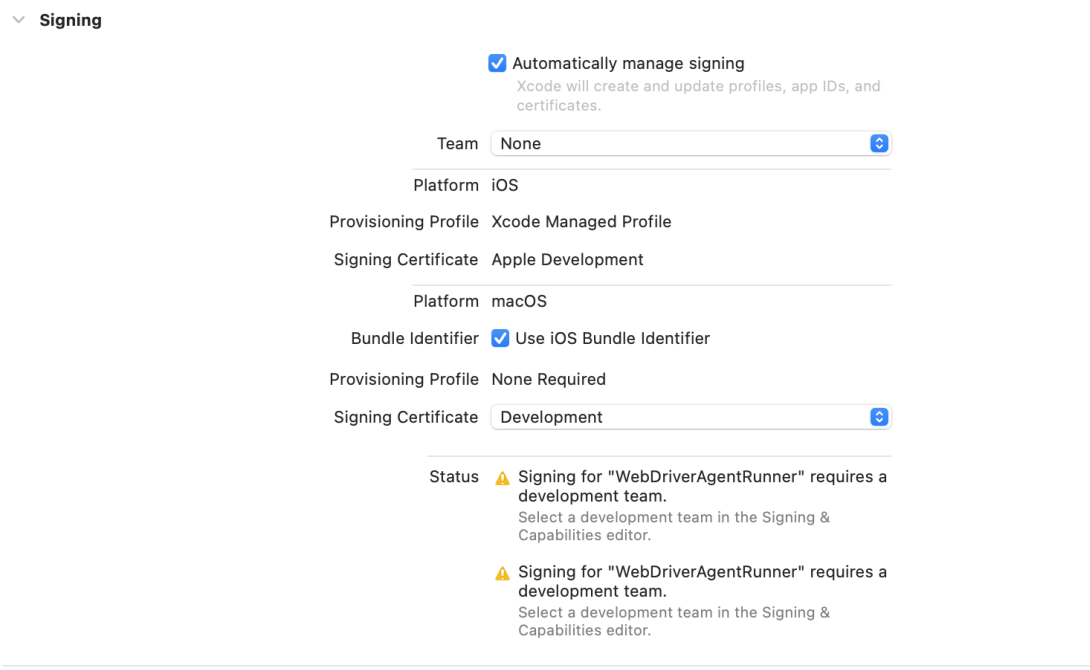
If you are the first time start Xcode, you will need to fill in your developer account and choose develop profile.
You can choose the team and provisioning profile under Signing section.
Be notice, free/single developer account can also sign the app and install on your devices, but you will need to re-sign the app and re-install to your devices every 7 days. Otherwise the app will be unsigned status and cannot automated.

Going back to Xcode, clicking the Run button, the whole project will building and then automatic install the app on your mobile. In this case you have set up Xcode success.
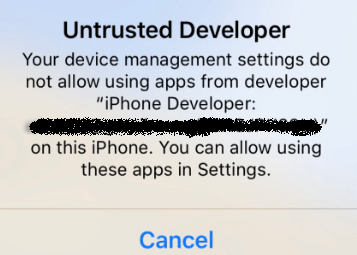
If you use free/single developer account or device has not trust developer certificate, you may see below errors on device.

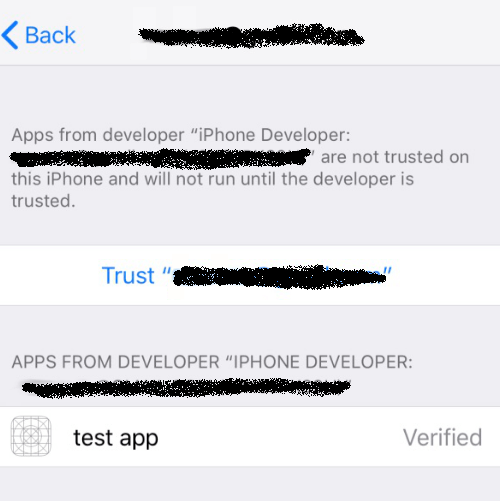
Then you need go to device Settings – General – Device Management, and pick the Developer App Certificate which we created earlier, then tap the link to trust the app we’re trying to test.

At this point, we have:
- Install all appium dependencies
- Linked device with Xcode
- Linked developer account with Xcode
- Linked device with the developer certificate used to sign our app
- Launched app manually on device
In the next blog of this series, we’ll learn how appium controls your app and the unique capabilities it needs to make it all work properly.


